Why is My Self-Leveling Compound Not Flat? (Causes and Solutions)
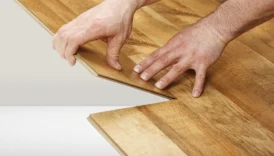
A self-leveling compound is a great option for surfaces that need to be raised, repaired, or smoothed. An easy-to-flow cement modified with a polymer, the self-leveling compound is frequently used to produce a smooth and level surface.
- Why is My Self-Leveling Compound Not Flat? (Causes and Solutions)
- What Leads to Non-Flat Self-Leveling Compound?
- If a self-leveling compound is not flat, what should you do?
- 1. Increase the amount of self-leveling compound.
- 2. Sand It Down
- In the event that the self-leveling compound is not flat, should I hire a professional contractor?
- Is Thinset Able to Flatten Self-Leveling Compound?
- Is It Possible to Use Another Product to Flatten Self-Leveling Compound?
- If the self-leveling compound isn't flat, can I add more water?
- Is Unevenness of Self-Levelers Prevented by Feathering?
It will flow and level itself when it is poured on a surface; all you have to do is spread it with a gauge rake. It works well for floors that need to be filled or that have dips.
Despite being a fairly helpful product, self-leveling compounds sometimes fail to cure into a smooth and level surface. When the self-leveling compound is not flat, what should you do? Continue reading to learn more.
What Leads to Non-Flat Self-Leveling Compound?
- Insufficient Product Pouring
Not pouring enough product is a common mistake made by most people who use self-leveling compounds for the first time. You must know how much product you will need to pour on your floors when you are shopping for a self-leveling compound.
It’s likely that some areas won’t receive enough of the self-leveling compound if you use too little, which could prevent an even surface from curing.
- Having Your Floor Take a Huge Dip
Dips in a hole can be filled in with a self-leveling compound. However, it might not dry into a level surface if the dip is too large. Measure the depth of your floor dips before applying the self-leveling compound.
- During installation, string lines were not used.
Using string lines during installation is a step that most people frequently forget to take. You can measure slopes or deviations on a floor using string lines. The self-leveling compound may not cure into a flat surface if string lines are not used.
- Inappropriate Self-Leveling Compound Mixture
If the self-leveling compound is not properly mixed, it will not dry into a smooth, level surface. A drill is the most effective tool for mixing a self-leveling compound.
Additionally, you should use the appropriate water ratio. The self-leveling compound’s flow can be impacted by either too much or too little water, resulting in dips and bumps.
- There are seams and holes on the floor.
A considerable amount of the self-leveling compound will spread into other areas and may dry into an uneven surface if there are seams or holes in the floor when the compound is poured.
If a self-leveling compound is not flat, what should you do?
The uneven self-leveling compound can be fixed in a few different ways. We’ll go over each approach, and you can select the one that best suits your situation.
1. Increase the amount of self-leveling compound.
The self-leveling compound may have a few dips if you observe that it is not flat after drying. Pouring more product on the floor is the simplest and fastest way to solve the problem.
The unevenness could have resulted from using too little product or from a large dip on your floor.
In any event, any dips left by the prior application should be filled in when more self-leveling compound is added.
On this second try, be sure to distribute it evenly. Additionally, remember to consult the manufacturer’s recommendations regarding the application of an additional layer of self-leveling compound.
Some self-leveling products, such as those manufactured by Maapei, require you to prime for 24 hours before applying another layer of self-leveling compound. This is crucial.
2. Sand It Down
Don’t add more product if your self-leveling compound has a few bumps and isn’t flat. Sanding the bumps until they are flat is the best course of action in this situation.
You will need an orbital sander, a scraper, and a chisel to accomplish this. This project can create a lot of dust, so remember to bring gloves, goggles, and a mask.
If the bumps are too large, you might want to use a chisel to pry them off the floor. To achieve a smoother finish, you can use an orbital sander afterward.
Sanding doesn’t require much attention because you can always fill in any dips you make with a more self-leveling compound.
In the event that the self-leveling compound is not flat, should I hire a professional contractor?
There aren’t any construction projects these days that you can’t complete on your own. All you need are the right tools and a little direction.
But don’t be afraid to call in the professionals if you’ve tried installing a self-leveling compound multiple times and it’s not flat.
Self-leveling compound is simple to pour. However, there is a learning curve. You get better at avoiding errors the more you practice.
Therefore, you can get assistance from a qualified contractor if you are experiencing difficulties installing a self-leveling compound. The best part is that a smooth and flat finish is guaranteed, and it’s not expensive.
Is Thinset Able to Flatten Self-Leveling Compound?
After the self-leveling compound dries, you can use a thinset to smooth out your floor if you intend to tile it. However, there is a restriction.
You can experiment with the thickness during tile installation to achieve a level finish if a self-leveling compound dries into an uneven surface and you intend to tile over it.
Please be aware that using too much thinset could cause some hollowness underneath the tiles, which could eventually cause cracking.
Although it is possible, using a thinset to flatten self-leveling compound is a task that calls for extreme accuracy and knowledge.
I would suggest adding more self-leveling compound to the dips until you achieve a flat surface if you lack sufficient experience.
Is It Possible to Use Another Product to Flatten Self-Leveling Compound?
Absolutely not. Two different self-leveling compounds should never be combined because the formulas might not work well together and could have disastrous effects.
When applying another layer of self-leveling compound, please use the same brand if you were using Ardex, Bostik, or Mapei.
The formulas and water-mixing ratios of self-leveling compounds vary, despite the fact that they are all designed to perform the same function.
As a result, if Ardex is applied on top of Bostik’s self-leveling compound, the two layers might not combine, which could lead to numerous issues down the road. Use the same product you started with for safety.
If the self-leveling compound isn’t flat, can I add more water?
You might think that adding more water will level the self-leveling compound when it dries and you see that it’s uneven. However, that is untrue.
The mixture will become weaker as more water is added. The self-leveling compound might not be as strong as it was at first as a result. Additionally, it might break or crack as it dries.
Allow the self-leveling compound to completely cure if you observe uneven drying. Depending on the brand you are currently working with, this should occur in a few hours.
After it dries, determine whether the unevenness is in the form of bumps or dips and use the techniques I previously described.
Is Unevenness of Self-Levelers Prevented by Feathering?
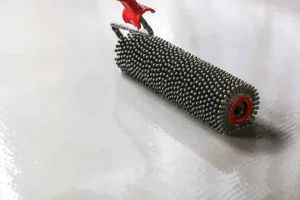
In order to guarantee that your self-lever dries into a flat and smooth surface, feathering is crucial. Self-levelers are designed to level and flow by themselves.
Experience has shown that, unless you use more water than is advised, this is typically not the case. And the dangers of this have already been discussed.
When applying self-leveling compound, it’s a good idea to use a rake to spread it out evenly. Feathing it at the end will help it spread more evenly. The difference that feathering makes in producing a flatter finish will surprise you.