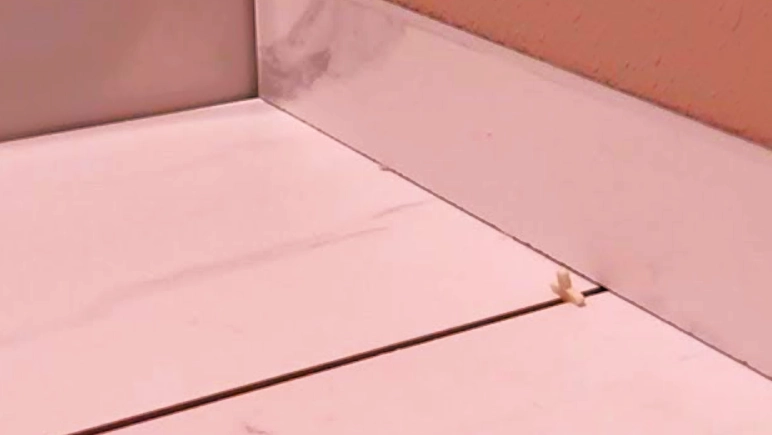
Wall Tile to Baseboard Transition
Because there are so many different styles and ideas to choose from, bathroom remodels are always fascinating. Installing tile on the walls is one of the most popular bathroom remodeling jobs. The process is really simple.
But you might encounter unforeseen challenges. For example, you might be asking how to create a smooth transition between baseboard and wall tile.
I’ll walk you through the suggested process of switching from wall tile to baseboard today. I’ll also provide you with some helpful hints for making the aforementioned change.
How Do You Make the Switch from Baseboard to Wall Tile?
Using a transition piece is the most effective way to construct a baseboard or wall tile-to-floor transition. Since this approach is less intrusive than others, I heartily suggest it. It’s also a lot simpler.
Therefore, it is better suited for do-it-yourselfers who are not too familiar with switching from wall tile to baseboard.
Here’s a detailed tutorial on switching from wall tile to baseboard:
- Step 1: Determine the Size of the Transition Piece Required for the Baseboard to Wall Tile Joint
You must measure the joint between the baseboard and wall tile precisely in order to guarantee that the transition piece fits flawlessly.
Remember to measure the baseboard’s height as well as the wall tile’s thickness. These steps will make planning easier for you.
- Step 2: Lay Out the Wall Tile, Leaving a Space Near the Baseboard at the Bottom
Go ahead and tile your wall. When you get to the bottom, though, make sure there is some room between the baseboard and the tiles. The change will take place there.
- Step 3: Add the Transition Piece of Your Choice
You can utilize one of three primary kinds of transition pieces in a baseboard to wall tile junction. I’ll enumerate them all and discuss their advantages. You have the freedom to select the one that best fits your preferences.
- Transition Strips: These are mostly utilized when the baseboard and wall tile are different heights.
These strips come in a variety of shapes and are primarily designed for transitional applications, which facilitate a seamless transition between materials. You can investigate your possibilities in the hardware store that is closest to you.
- The most popular transition element for baseboard to wall tile joints is tile trim. A tile trim creates a perfect finish by fitting perfectly between the tile and baseboard.
Tile trimmings come in a variety of materials, such as metal or PVC. The latter can greatly enhance the appearance of your transition by giving it a distinctive appearance.
- Quarter-Round Molding: A quarter-round molding is an additional transition piece that can be used to fill this joint. A quarter-round molding produces an undetectable transition because of its curved shape. PVC or wood are used to make quarter-round moldings.
Once you’ve selected the perfect transition piece, trim it to the length you want. You can use a saw or miter box. Then use a powerful adhesive to install it.
For this transition, the ideal glue should be able to adhere to both baseboard and tile. As the adhesive dries, press the transition piece farther into the junction.
You can always use finishing screws to secure the transition piece more securely if you’re unsure about the strength of your adhesive.
- Step 4: Adjust the Constructed Transition
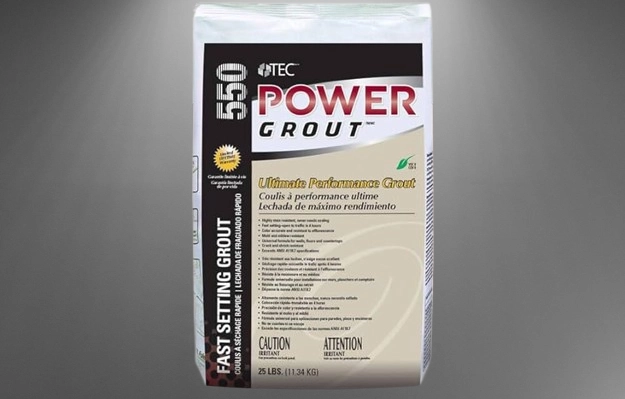
It goes without saying that certain gaps might remain once the transition piece is installed. Caulk or grout should be used to fill them.
By completing these gaps, the change will seem more seamless. And that’s how you make the ideal transition from wall tile to baseboard.
Is it possible to transition from wall tiles to baseboards using grout alone?
No, using grout alone to convert a tiled wall to baseboard is never a good idea. Grout is a great way to fill in the spaces between tiles, but it doesn’t work well for joining large joints.
It is prone to cracking when utilized in a baseboard to wall tile junction. Furthermore, it won’t have a beautiful appearance. Use a transitional piece and enough grout to cover any small spaces just to be safe.
What Other Ways Are There to Switch from Wall Tile to Baseboard?
A baseboard-to-wall tile transition can be made in two different ways. Below is a synopsis of each method:
- The Flush Method: This technique involves installing the wall tiles first. After that, the baseboard is put in place immediately over the tile. A flush transition results from this.
- The Overlap Method: In this technique, the baseboard and wall tiles overlap. As a result, the top portion of the baseboard is covered by the wall tile, creating a transition.
These two approaches require a certain amount of ability and accuracy. Additionally, you might have to take out and reinstall the baseboard, which is a lot of labor. Either of these two approaches is always an option if you are capable of handling the situation.
Typical Obstacles in the Transition from Wall Tile to Baseboard
You will achieve a perfect transition between baseboard and wall tile by using the technique I previously described.
But occasionally, you could encounter a few problems. You can learn how to prevent or handle some of these issues by being familiar with them.
- Varying Tile Thickness: It’s likely that the tiles you’re using will range in thickness if you’re using a different set.
It will be challenging to switch to a baseboard with such tiles. Using tiles of the same thickness is a smart idea.
- Uneven floors and walls—let’s be honest. Not every wall is level. A flush or smooth transition will require a number of changes if your walls are somewhat uneven.
- Inaccurately cut tiles or transition pieces: Accuracy is key while creating transitions. Poor cutting of the tiles or transition pieces will result in many gaps or strange-looking areas. Use a miter saw to make sure your cuts are flawless.
- Color Matching: Transition pieces are available in a variety of hues and finishes. They must be carefully chosen to blend in with the wall tile or baseboard. The aesthetics will be off if it doesn’t go with either.
- Inadequate Maintenance: Dirt, moisture, and other materials may build up in the space where these two materials meet. The transition piece’s adhesive may deteriorate if routine maintenance is neglected.
Can a Cove Tile Be Used in Place of a Baseboard in Place of a Transition?
Yes, you can. Cove tiles were designed especially for wall-to-floor transitions. But first you’ll need to take off the baseboard.
Therefore, you can use cove tiles in place of the baseboard if you don’t mind removing it. Using cove tiles has a number of benefits.
First of all, there won’t be any transitions for you to cope with. Second, cove tiles that resemble your wall tiles are available. Your walls and flooring won’t have contrasting finishes as a result.
Is it possible to butt-join baseboard and wall tile?
It’s not a good idea. Baseboard and wall tile are composed of various materials. Solid wood used to make baseboards swells and contracts in response to changes in the environment.
These vibrations would be transferred to the tiles through a butt joint, which could ultimately result in cracking. Under no circumstances should you make a butt joint between the tile and baseboard.