Tub-To-Floor Transition
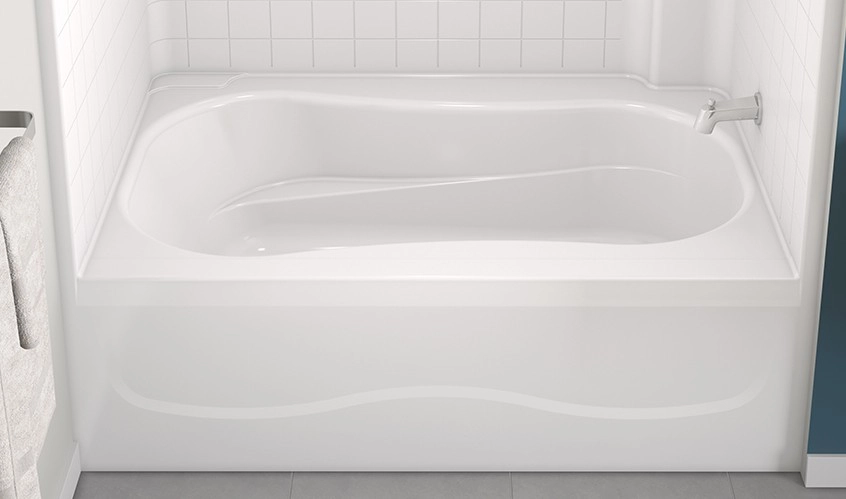
It’s common for there to be a space between the bathtub and the floor when installing one. If aesthetics are important to you, you should cover that gap because it might look unattractive.
You’ve come to the right place if you’re doing this project for the first time and are unsure of how to make the ideal transition from tub to floor.
I’ll walk you through the steps of making a visually appealing transition from the tub to the floor in the guide below, along with any additional information you might need.
How Can a Tub-to-Floor Transition Be Made?
- Step 1: Compile the Items Below
Three key items are required: cove molding, masking tape, and silicone caulk. You can purchase these supplies at a local Home Depot, Lowe’s, or other hardware store. Another option is to buy them online.
- Step 2: Determine the Tub’s Length to Floor Transition
Prior to proceeding, you must use a tape measure to determine the length of the floor-to-tub transition. This measurement will assist you in determining the appropriate cove molding size to use within that opening. Make a note of that measurement.
- Step 3: Cut the cove molding and insert it into the opening.
Cut your cove molding according to the above measurements, then attempt to fit it into the space between the tub and the floor. This component is essential because it establishes whether the cove molding will fit precisely.
After it fits, remove it and place it aside. PVC is used to make cove moldings. Because of this, cutting them with a saw or sharp knife is not too difficult.
- Step 4: Clean the Space Between the Tub and the Floor
Cleaning that gap is advised even though you can begin building the transition immediately. Contaminants and debris may hinder adhesion. Therefore, to remove dust and debris, use a vacuum.
Next, wipe the gap with a clean cloth dipped in rubbing alcohol. Alcohol usually dries quickly after rubbing. Thus, you can immediately proceed to the next phase.
- Step 5: Apply some masking tape to the tub and floor on both sides.
You will find it easier to remove the silicone caulk that we will apply later if you use masking tape. On both sides, make sure the masking tape is about an eighth of an inch from the opening. You can refit the molding cove to its original position to obtain a more precise measurement.
- Step 6: Apply the silicone caulk.
Remove the cove molding and cover the entire gap with silicone caulk.Being a powerful adhesive, silicone caulk solidifies into a long-lasting material that keeps water and air out.
Thus, it will waterproof your transition in addition to improving adhesion between the gap and the cove molding.
- Step 7: Install the Cove Molding
Fit the cove molding onto the gap as soon as the silicone caulk has been applied and spread. This is done in order to guarantee that the caulk sticks the cove molding to the opening.
Remove the masking tape and use your hands to wipe off any extra silicone caulk. You’ll have accomplished a smooth transition from tub to floor.
When selecting cove moldings, it’s a good idea to choose a finish that matches the tub or floor. This will give the transition a more consistent look.
Can a Tub-to-Floor Transition Be Made Using Only Silicone Caulk?
Sometimes silicone caulk can be used alone to create a tub-to-floor transition because of its remarkable qualities. However, the finish achieved with cove molding is superior to that achieved with silicone caulk alone.
You can always use silicone caulk alone if you’re in a rush to complete a tub-to-floor transition or if you can’t find a cove molding. Clean up the gap and generously apply caulk to achieve this.
To make a smooth joint, wet your finger and then run it through the silicone caulk. After that, you can remove any extra caulk to make the transition smooth.
In the majority of tub-to-floor transitions, this is standard procedure. But just to reiterate what I said earlier. Installing cove molding will produce a more beautiful transition than using silicone caulk alone.
How Can Large Tubs Be Converted to Floor Gaps?
Tubs that are on the same level as the floor can be used with the aforementioned technique. When it comes to creating a smooth transition, it could be difficult if your tub is a little higher. Fortunately, there are a few treatments that are worth a try.
You’ll need to use your imagination if the tub-to-floor gap is larger, ideally greater than an inch wide. For example, you can install cement board, tile, and an uncoupling membrane on the floor next to it. It can move closer to the tub and take up more floor space thanks to these three items.
Additionally, if the tub is not level with the floor, it must rest on a bed of mortar. In addition to facilitating the transition, this will ground the tab and stop it from moving by itself.
Be ready to redo caulk joints more often as you try to construct a transition on an excessively large tub-to-floor gap. For this reason, proper tub installation is crucial.
What Is the Duration of Tub-to-Floor Transitions?
The transition will last for years if you follow the above recommendations for silicone caulk and cove molding. PVC is typically used to make cove moldings.
The ones that are made of plastic last longer than those that are made of wood. Because silicone caulk is resistant to water damage, your tub-to-floor transition will last for many years.
Tub-to-floor transitions that are solely made with silicone caulk have the drawback of having a short lifespan. This is due to the absence of structural support in such a setup. Over time, chips and cracks might become apparent.
How Can Tub and Floor Transitions Be Colored to Match?
Even showers should be finished with consistency and cleanliness. As a result, you must keep the design consistent when constructing a tub-to-floor transition. You can accomplish this in two ways.
It is possible to find silicone caulk that is the same color as your tub. Usually, if your tub is white or another neutral color, this will be simpler.
Conversely, you can get cove molding in a finish that matches your floor or tub. It is your responsibility to consider these options and determine which one best fits your needs.
Is it Possible to Make a Tub to Floor Transition with a Bullnose Tile?
Yes, you can. The edges are where bullnose tiles are most frequently used. However, they can also be installed on transitions from tub to floor. To complete this project, you will need to know how to tile. However, it is still feasible, and the final product can have a stunning appearance.
Using a bullnose tile has the advantage of being simple to match to your floor, allowing for a smooth transition.
Should I Get Help from a Professional to Construct a Tub to Floor Transition?
That depends on your perspective on do-it-yourself construction projects. It’s a fairly easy process, especially if you follow my instructions. However, you might encounter a number of problems if you are not a do-it-yourself enthusiast.
It is not a bad idea to hire a professional to build a tub-to-floor transition because you can be sure that the work will be done well. However, you will also be required to pay labor fees.