How to Seamlessly Transition from Plaster to Drywall (Step-by-Step + Expert Tips)
It’s very likely that the walls in your house are plaster if it was constructed in the middle of the 20th century. Furthermore, despite the fact that plaster walls are perfectly acceptable, homeowners frequently express interest in switching to drywall due to its numerous advantages.
I’ll be walking you through a thorough guide to the plaster to drywall transition in today’s post. Additionally, I will provide advice on how to switch between plaster and drywall on the same wall. Why don’t we start right away?
Is It Possible to Switch from Plaster to Drywall?
The switch from plaster to drywall is entirely feasible. Many homes constructed in the 1900s have undergone drywall renovations. The good news is that there’s no need to rip the plaster off.
There is a simple method of switching from plaster to drywall that avoids the time-consuming process of removing plaster. I’ll be sharing that technique with you below.
How Can Plaster Be Converted to Drywall?
-
Step 1: Inspect and fix the plaster wall
Regretfully, your walls are unlikely to be in the best shape if they were constructed with plaster several decades ago. For this reason, I’m suggesting that you begin with a comprehensive inspection.
Verify the stability of the plaster wall. Because drywall failure following the transition is likely to occur if it isn’t.
Removing as much damaged plaster as possible is a professional advice that you can use. Don’t only concentrate on the plaster, either. Examine the wall’s frame to determine whether more repairs are necessary to strengthen it.
-
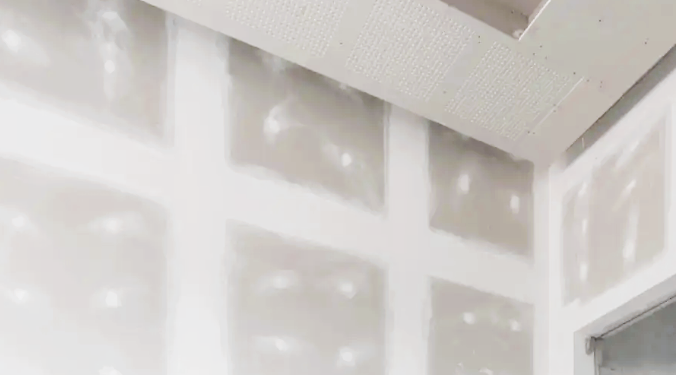
Step 2: Attach the drywall to the plaster using screws.
To cover that wall, gather the drywall pieces you’ll need. After cutting them to the appropriate size, screw them into the plaster. Attach the drywall with screws to the wall frame’s studs to provide a solid transition.
You had to remove a large portion of the plaster when it was severely damaged. The drywall can always be directly hung to the framing.
It makes sense that many individuals would be terrified of such a change. But you won’t have any problems as long as the drywall is securely fastened.
A bonding agent can be used to strengthen the bond and guarantee a smooth transition between these two materials.
Durabond ought to be ideal for this work. Additionally, a bonding agent is excellent in stabilizing plaster walls.
-
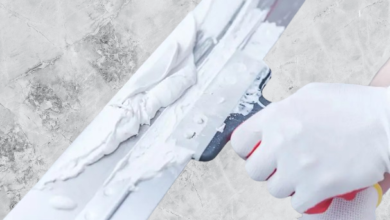
Step 3: Sand it and apply some joint compound.
The drywall needs to be smoothed out and evened up with joint compound. This is an important step since it affects how your new wall will look.
Allow it to dry after using joint compound, then sand it down. The drywall can then be painted over to improve its appearance. You will then have successfully made the switch from plaster to drywall.
Reasons for Switching from Plaster to Drywall
Is there another incentive to do a plaster-to-drywall transition besides the fact that it’s a long-overdue upgrade?
After switching from plaster to drywall, you’ll experience numerous advantages. Among them are
- A variety of finishes, including paint and wallpaper, may be applied to drywall, which also looks nicer.
- Hanging drywall is more simpler than applying a new coat of plaster, which helps expedite improvements. Additionally, drywall is far less expensive than putting fresh plaster.
- If you’re a do-it-yourselfer, drywall is simpler to fix than plaster and you don’t want expert assistance.
- The best material for this transition is drywall if you’re craving a modern wall design. It is more adaptable, lighter, and smoother. Additionally, drywall is more suitable under current construction requirements than plaster and other materials.
Hopefully, the additional advantages of switching from plaster to drywall have allayed any concerns you may have had thus far.
Professional Advice for a Plaster to Drywall Conversion
It’s evident from the approach I described above that this transfer is really easy. You must exercise extreme caution, though, as one mistake could result in expensive catastrophes.
I’ve included some advice below to make sure your plaster-to-drywall transition goes smoothly and prevent any problems down the road.
- Make a plan before you start. I’m referring to figuring out how many drywall panels you’ll require and assembling the necessary supplies. By doing this, future issues are avoided.
- Remember to check the plaster wall’s condition. Before drywall is hung, this will indicate that repairs are necessary.
- The advantages of employing a professional should not be understated. I am aware that all of you do-it-yourselfers enjoy a challenge. However, it makes perfect sense to have professional assistance if you have little experience installing drywall. This reduces the possibility of mistakes.
- Verify that the plaster is securely fastened to the drywall. I cannot stress enough how crucial this is. As long as the drywall screws are driven into the frame’s studs, they ought to perform the job.
- Give careful consideration to the drywall’s finishing. The drywall must be finished after the transition to make it smooth, level, and presentable.
How Can a Plaster to Drywall Transition Be Maintained?
After switching from plaster to drywall, you still have work to perform. To make this transformation endure longer, you will still need to maintain and care for it. I would suggest a few things, including
- Preventing dampness. Plaster and drywall are not very fond of moisture. The structural strength of both materials may be weakened if it is introduced during this transition.
- Take care not to apply excessive pressure or force during the plaster-to-drywall transition. This can seriously harm both materials. Additionally, avoid hanging bulky items on drywall that has been converted from plaster.
- Keep an eye out for any indications of drywall damage and take immediate action. This avoids negative consequences.
- When it comes to painting and touch-ups, don’t overlook that portion of the wall. Periodically, it still needs to be refinished.
How Can a Plaster Wall Be Converted to a Drywall Wall?
You might occasionally put drywall where it meets a plaster wall. You’ll be left with a seam or junction in this situation, and you might be wondering how to best switch between these two materials.
The answer is really straightforward: all you need is joint compound and drywall tape.
Make sure there is very little space left behind if you want to switch from plaster to drywall on the same wall. To accomplish that, measure and cut the nearby drywall panel till it nearly touches the nearby plaster wall.
Next, fill in that space with a layer of joint compound. After that, apply drywall tape and a second coat of joint compound. To ensure an equal transition, feather it out on both sides of the plaster and drywall.
To achieve a smooth finish on that transition, let the joint compound dry for a day or so, then sand it down.
Primer and paint should be applied over the joint once it is not visible. The changeover will be flawless and imperceptible.
Joining plaster and drywall does not require a transitional piece, in contrast to other types of transition. Only if the gap is too large will it be required. Additionally, I wouldn’t suggest leaving a large space between the plaster and the drywall because that could cause cracking.